|
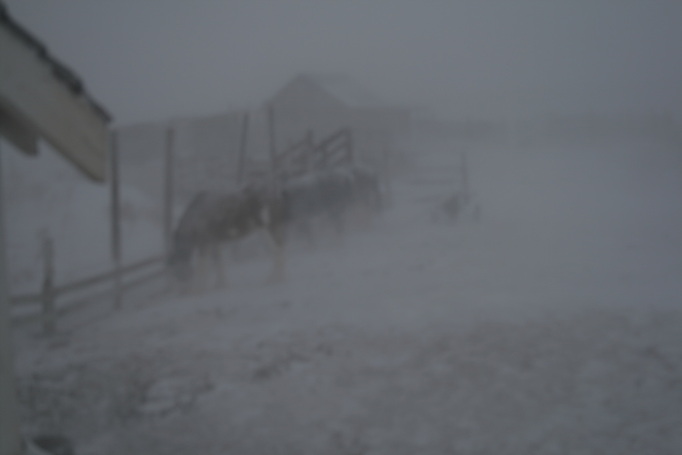
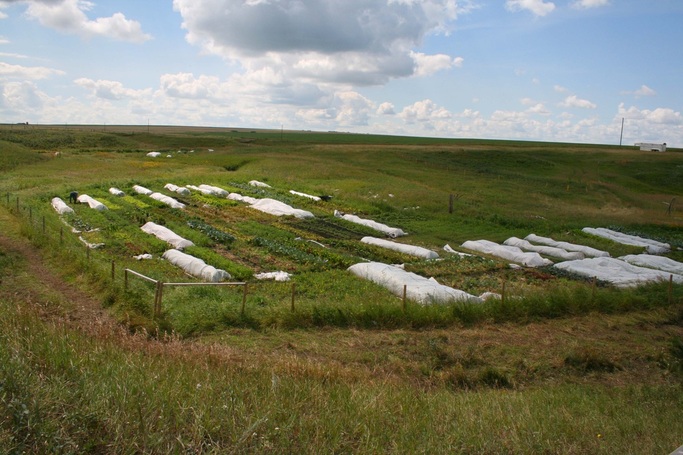
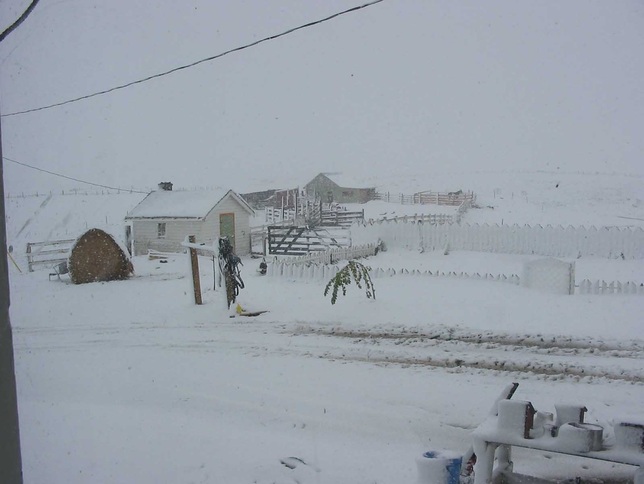
Hell is a strong word, but let me explain. The northern tier of North America's high plains, the region encompassing all of southern Alberta and southwest Saskatchewan and extending south in an eastward flexing arc all the way down to embrace the Texas panhandle and eastern New Mexico, hosts one of the most extreme climates on the planet. Where else on earth can temperatures fluctuate from lows of -40 to highs of +40 Celsius in course of a fairly typical twelve-month cycle? Oh, the soil can be rich indeed, depending on where you are, but add to these caveats of temperature the fact that it is windier here than an old man's yarns, drier than the humor contained therein and as unpredictably frosty as the fed-up wives who've endured years of such bullshit and you can see why this region could be considered hell, at least where vegetables and additional things, no doubt, of general tenderness, are concerned. Yet it is here that Andrea and I decided to start our CSA (have you read our "Dumber 'n a 'Possum" blog entry yet?) It was trial-by-fire, or for the more amphibious of bent, sink-or-swim, as we had jumped right in with both feet and no life-jacket. We needed a system of growing that could withstand pretty much the worst conditions nature could throw at a gardener anywhere actual soil occurred. The system we came up with we feel worked admirably, and we're confident it could be adapted by anyone, anywhere and yield gratifying results. We'll outline it for you here.  A fine high-plains April morning. Thompson Small Farm, 2009. Those barely discernible smudges are Clydesdale horses, about ten metres from the camera. A fine high-plains April morning. Thompson Small Farm, 2009. Those barely discernible smudges are Clydesdale horses, about ten metres from the camera. We start in late March or early April with a small greenhouse, which at this time of year, especially at night, will sometimes need some supplemental heat. We have provided this heat at intervals woodstoves piled around with rocks for thermal mass, electric and propane heaters. We like the stone-heaped woodstove method best, as it appeals most to our desire for self-reliance. Next, we either mix our own potting soil mixture or get some bagged stuff, and you can probably guess which approach we like best there. Out come the soil-block makers, an assortment of sized punches ala Eliot Coleman's "The New Organic Grower" (refer to our online store, which contains most of the reference works you'll need and which we, by their inclusion, endorse - including this one.) The punches create blocks of soil that hold together and negate the need for pots - a real blessing! We use the 2 inch size almost exclusively. You can pack a lot more plants into a space using the one inch size, but you need to re-pot them into two inch anyway, so why not skip this step? Seedlings, to make a long story short, are raised to optimal transplant size in these 2-inch blocks set into flats, about 40 - 50 per. While they're growing, we've been out there preparing the soil. This year, we've been feeding the animals on the garden space over the winter, in order that their ordure will generously anoint the land by spring. By doing this, you save on work spreading organic matter - it comes straight to the land from the horse's... it's there already. So this year, preparing the garden space will consist of harnessing the Clydesdales and driving them around the garden with a dual gang of spike-toothed harrows trailing, spikes in the flat position, to spread out the manure piles over the area. Next, we'll be turning the soil - not too deep - with a plow (horse-drawn, of course. If all you have is some machine, well, you'll have to make do with that for now. Hopefully you'll have animals of some description for manure, or you'll have to get your hands on some of that too, or better yet, compost.) The soil must be moist and friable for this step, but not too moist. Plowing is best done in the fall, so that the frost action can work on the turned soil over the winter, but if this system of "soiling the land" over the winter is used, you'll have to do it in spring, to work in the nutrients and organic material. That's okay. Just remember that when plowing is done in the spring, the disc-harrowing that always follows must be done immediately following the plowing to conserve soil moisture. So then, we disc harrow the plowed land. (If you plow in fall, the harrowing can wait til spring, and becomes the first tillage step.) Disc harrowing, back and forth and across and at all angles breaks down clods into a nice seed-bed, but the edges of the discs also compact the soil some, so we follow this step with some spring-tooth harrowing, or cultivating as some call it with this implement, to loosen the soil back up and give it loft. (We recommend "Implements for Farming with Horses and Mules," available through our store, for an understanding of equipment and the applications. It's the same sort of stuff you'd be using with a light tractor.) Now comes the making of raised-beds. Raised beds needn't have borders, and in fact this would be far too labor and infrastructure intensive for larger scale gardening anyway. Instead, they are just raised rectangles of soil, in our case about five metres long by a metre wide, by perhaps a hand-width or a little more high, allowing for from two to four rows of plants. In the past we've made these beds by hand, with a hoe, once the horses have helped us prepare the soil. It takes maybe fifteen minutes per bed if you've loosened the soil adequately, as needs be. If you can't get enough soil up into beds, get back in there with the spring-tooth harrow. This year I've added an application to our basic home-made stone-boat, a set of adjustable discs on a rear-mounted frame that i'm hoping will assist in making the beds with the horses doing the bulk of the work. The discs can be set wide or narrow, to heap the soil or make a planting furrow. We'll find out how this works! Raised beds are one of those steps that can make a night-and-day difference between small, stunted vegetables, and big proud ones. This is because the loosened soil, raised above the cooling thermal mass of mother earth, warms more quickly and allows for better penetration and retention of moisture and oxygen, not to mention root-growth. So, once your field is arranged into beds (leaving room to walk between and larger corridors for bring wheelbarrows and such out there,) let some time elapse, if you have the luxury (you won't some years,) so the weeds can get a start. Once they've sprouted, hoe them under. Hopefully there won't be too many, but this is a way of pro-active weed control, and it's added organic material as well. Now, a top-dressing of compost is in order, if you have it on hand, although it may not be necessary if you've fed the soil adequately as we've described. If you've got it, and you should have it, then use it. Just sprinkle a thin layer atop each bed - you don't need to work it in. Follow this with a thin layer of mulch - leaves, grass, straw, old hay, whatever. The mulch helps further with weed-control, adds further organic matter for soil building, and holds moisture. It's incredible, in fact, how much effect mulching has on soil moisture. It can spell the difference between needing to water liberally every day or two and just being able to rely on rainfall, or at the most, watering weekly. But it must be thin at first, as it also cools the soil, something you don't want to do in the spring, and defeating one of the purposes of the raised beds. You're now ready for your transplants. Before you bring your flats of soil blocks containing the baby vegetables out to the field, spend a few days introducing them to the full, unfiltered sun in increments, or they will be unhappy, or dead. It takes some "hardening-off" to get them ready for the full elements. Then you can take them out to the field with you. Mind-you, keep those bastards moist! They dry very quickly in the open air. Refer to your reference materials for spacing for the different plants, part the mulch and make a hole and insert the block. Gently squeeze it just before covering to break the form of the block and keep the roots from binding. Don't then pile-drive your fingers around the base like an eye-gouging street-thug as I've seen some guys do in order to anchor the plant. A little gentle tamping, like seating the tobacco in your pipe will do. Once a bed is planted as such, we then water each transplant in, regardless how moist the block is, and then we do it yet again, this time with a pressure-sprayer and a little fish emulsion added to the water. Just a squirt or two into the base of the little plant. We do the fish emulsion thing last so the previous watering doesn't flush the root-establishing nutrients down into the bed. Tuck the mulch back in around the base of the little plant. If you were somewhere pleasant, you could probably stop at this point. You are not somewhere pleasant, however, at least not for the sake of this instruction. This being the case, you're not done yet! And hey, even in a reasonable climate, the additional steps I am about to outline might just make you legendary. Give it a try, maybe in some trial plots. Anyways, now it's time to get out the 9-gauge wire and cut some hoops from it. You're going to push the ends of the wire into the ground to form semi-circular arcs over your beds at about one-metre (39 inch or so) intervals. They should allow for at least thirty centimetres (a foot) of clearance beneath them. You are in essence making a mini-hoop house over each bed. Over the hoops, you unroll a length of a product called "Agribon" or something similar - a gossamer-light fabric that admits both sun and precipitation, yet raises the temperature underneath by around three degrees Celsius, protects against frost, insect pests, and wind. (Wind robs plants of energy and stunts growth. And by the way, you can use this fabric in your starter greenhouses as well, draping it loose over flats at night to protect seedlings against frost.) You can use soil, rocks, sandbags, logs, or twenty-foot (about six metre) lengths of rebar to hold down the edges of the fabric. If you choose rebar, you can then use the same lengths at some other juncture to erect larger walk-in hoop houses when you need to. Soil is hardest of these choices on this material, but it doesn't last more than a couple of seasons in our climate anyway. We have lately gotten into the practice of buying this row-cover material in sufficient widths to cover two beds at a time, saving on labor. The hoops are still cut to width for one bed - they wouldn't be rigid enough for two beds, and you'd be tripping over them in the rows anyway.  Field layout, Thompson Small Farm. Some beds with mature plants are open, some are covered single-beds, and the wider arrays are covering two beds at a time. The corner of a second garden area is just visible in the background. Field layout, Thompson Small Farm. Some beds with mature plants are open, some are covered single-beds, and the wider arrays are covering two beds at a time. The corner of a second garden area is just visible in the background. You can open these covers to water, or water right through them, or better yet, it hopefully rains enough that you don't ever have to. As the season progresses, thicken the mulch layer to better hold moisture and suppress weeds. When the plants begin to bulge the fabric, open up the bed to the air. It's always exciting to see what's under there! Okay, there's our system in a nutshell. If you can't get a garden to grow using this method, you're probably an Eskimo and have many equally rewarding things to do anyway.
17 Comments
Ms. Crescentia
6/14/2012 11:32:42 pm
Thanks Jon! I really liked the information on the raised rows and the white material that you lay over the young plants! I also enjoyed reading your whole blog here: your humor, natural flow, intelligence, and insightfulness are a refreshing change in a world full of time- wasting meaningless tripe.
Reply
6/10/2013 01:54:24 am
I liked the style of writing. The information was not new to me, but the way its filing loved.
Reply
9/23/2013 06:49:56 am
Thanks for posting this. I wish it was able to be translated, but for some reason Google toolbar isn't working. I copy pasted it into another application and read the post. :-D 8/17/2013 12:11:11 am
If you were somewhere pleasant, you could probably stop at this point. You are not somewhere pleasant, however, at least not for the sake of this instruction.
Reply
11/11/2012 06:40:38 pm
It is best to smoke the spirit of quality pipes.
Reply
4/11/2013 11:30:12 pm
Propane is derived from natural gas or refinery. Serves as a gas boiler or in a liquid state, as fuel in cars.
Reply
5/15/2013 02:41:10 pm
After reading your blog post I am inspired with the writing and looking forward to write a blog on the same including my view points. I will share my writing content soon! About this blog post, very informative and inspiring as well. Good Job!
Reply
8/8/2013 04:34:12 pm
We start in late March or early April with a small greenhouse, which at this time of year, especially at night, will sometimes need some supplemental heat.
Reply
9/23/2013 09:47:17 pm
This is a very nice post I found some dedicated data here I've got variant followers on twitter and that i can tell all of them concerning this as i actually assume it's nice data that additional individuals ought to see sustain the great work be back once more presently
Reply
9/29/2013 02:29:29 am
This is so great! Do you plan on having a showing soon?
Reply
10/6/2013 01:08:39 pm
They don’t have personality or interests. No one wants to date a womp womp, let alone follow or fan one on Twitter or Facebook.
Reply
10/13/2013 04:37:51 pm
This content troubled i really do loads of trendy guidance i just hadn't checked out previous to. Д±t had been effortlessly outstanding but additionally exceptional important things, We're thrilled to have realized plus it!
Reply
The reviewer services especially literatures are mainly for the <a href="http://www.bestdissertation.com/services/dissertation/literature-review.html">literature review help</a>. That means they do the review action in order to ensure the acceptability of the writing. It is out of question that the literature studying students especially are the beneficiary from such sort of service in fact.
Reply
10/29/2013 04:29:33 am
Oh! Amazing toil in the midst of the article. I stumble on few helps over here related by this post to make my task nicely. I highly recommend this. Thanks a lot………
Reply
11/1/2013 05:23:21 am
Good day. Read your article and I loved it. I'm surprised that the author is so knowledgeable in this subject. After all, this topic is seldom podnimaetsya.Spasibo author and wish you continued success. I will read you.
Reply
Leave a Reply. |
AuthorHave a look at our "Education/Contact" page for info on the author. Archives
March 2020
Categories
All
|


 RSS Feed
